How to Translate on StoryWeaver
Posted by Remya Padmadas on April 15, 2020Here's a step-by-step guide on how to use the Translate tool on StoryWeaver:
1. Login to your StoryWeaver account using your email ID and password. If you don’t already have an account, sign up here. A confirmation email will be sent to the email ID you have used to sign up. Please confirm your account to complete the sign up process.
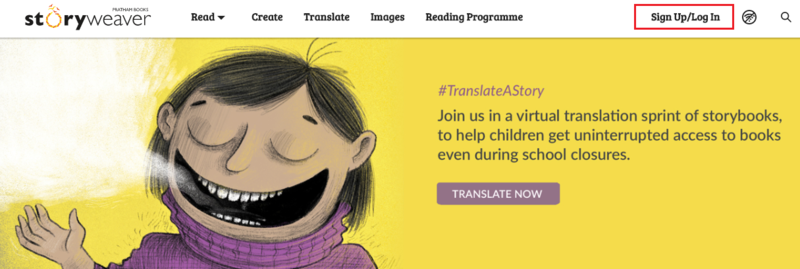
2. Click on the Translate tab on the StoryWeaver homepage. Select the language you would like to translate to. Remember to translate the story in the language with which you are most familiar with or in the language in which you think and feel! The stories that come up will be the ones that do not have translations in your chosen language.
![]()
3. Selecting a story for translation
- You can narrow your story choices by using filters like Reading Levels (who are you translating the story for), Categories (what kind of stories are you looking for) etc. Browse through the selected stories and pick the one you would like to translate.
- Once you have selected the story, we suggest you read the story a few times before you begin translating. You can do this by hovering the mouse on the story card, clicking on the 3 dot menu and selecting the 'Read Story' option from here.
- After you have read the story, click on the TRANSLATE button on the story card.
![]()
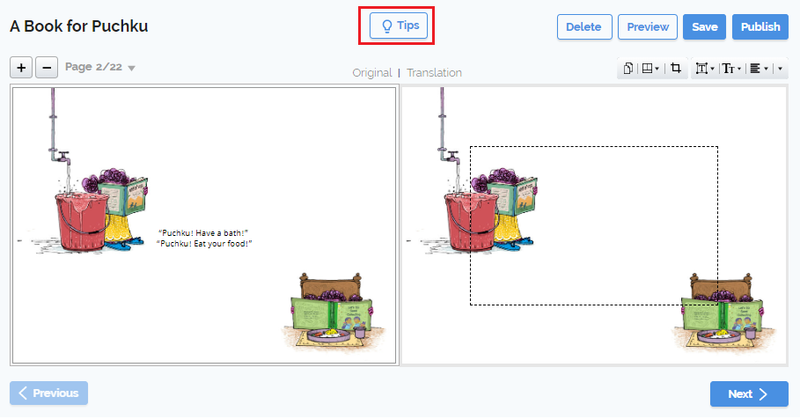
4. Setting up the translation draft
- The story will now open in the Story Editor along with the original text on the left hand page as a reference for you while translating. This reference text does not get published.
- The Tips button at the top will give you handy tips and best practises in translating children’s picture books.
- To know more about the translation process, check out our Translate Tutorial or read the answers to Frequently Asked Questions about translation. You can also find some great translation tips here.
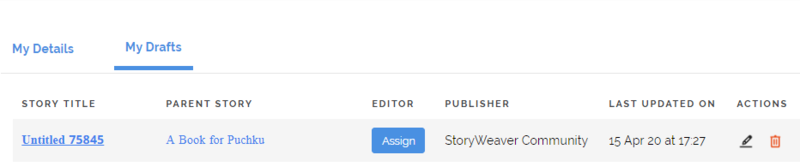
- You can save your translation and find it under ‘My Drafts’ in your Dashboard.
- You can now translate without using the internet. To know more about our new Offline Translate feature, click here.
![]()
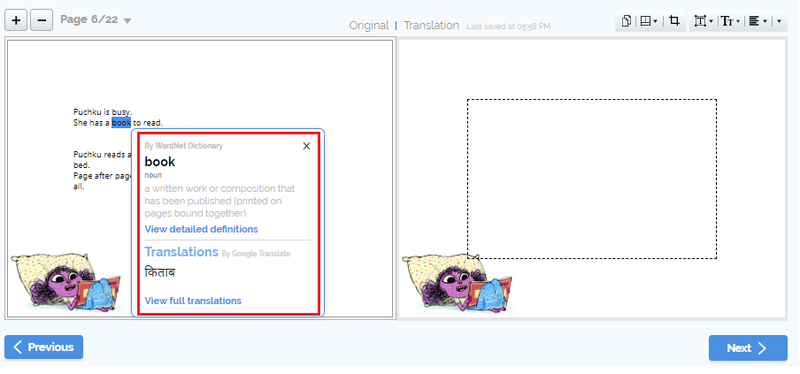
5. Start translating
You can add your translation in the Story Editor window on the right side. Please note that only Unicode fonts work on StoryWeaver as it's a universally accepted standard display of font.
- You can type using the language keyboard on your machine or start translating the text phonetically in the text box. For example, you can type "namaste" in English to get "नमस्ते" in Hindi, which sounds like "Namaste". As you start typing the word in English, a list of possible transliterations will appear. Choose the one you want and press 'Enter'.
- StoryWeaver offers transliteration support for 12 languages and dictionary support in over 100 languages to help with choosing the right form of the word in the translation.
- If your chosen language does not have transliteration support, we recommend that you use Google Input tools. From Google Input tools, you can just copy & paste the translated text into StoryWeaver.
6. Formatting your translation
- You can change alignment, text size and text style using the formatting options in the editor. For better readability, we recommend matching these to the style, size and alignment used for the original text (on the left hand page).
- You can add a duplicate page if the translated text does not fit into the text box (dotted lines). The duplicate page can hold the remaining text.
7. Getting ready to publish
- We recommended previewing your draft before you publish (from the Preview button in the editor).
- Hit the Publish button when you are ready.
- This will open the Publish form. Fill in all the details, including the translation of the synopsis in the form before clicking 'Publish'.
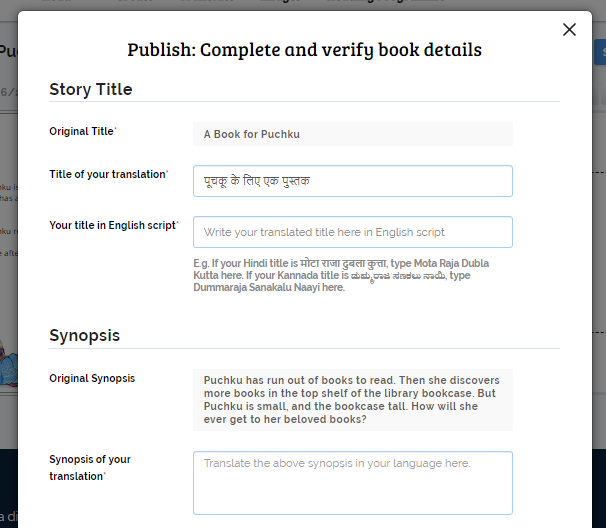
- Your story will appear in ‘New Arrivals’ shortly.
8. Share your work, build your profile
- You can share your translation on social media so that others can enjoy it too. You can click on the Share button from the Story Details page of your story and share your story on WhatsApp, FaceBook or Twitter.
- Lastly, don’t forget to update your profile page by adding a few lines about yourself, a profile picture and contact info (email ID/ social handles, if any) in the ‘My Details’ section of your Dashboard.
If you have any questions or are facing any issues, please write to us at [email protected]
Leave your thoughts in the comments section below! You can also reach out to us through our social media channels: Facebook, Twitter and Instagram.
comment (1)